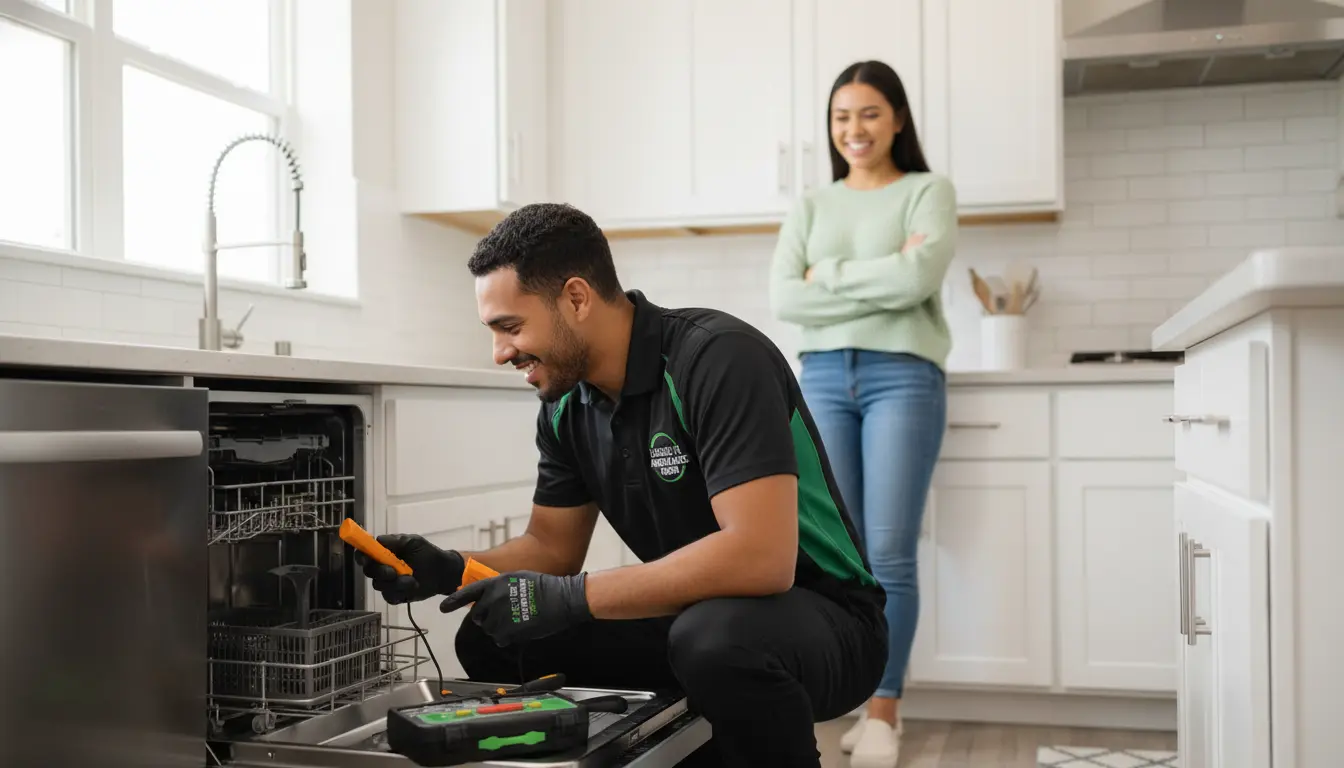
In 2026, the National Appliance Service Technician Certification program estimated that over 68% of all residential appliance service calls in the Gulf Coast region involved at least one electrical fault, ranging from simple tripped breakers to complex control board failures. For League City homeowners living within a few miles of Galveston Bay and Clear Lake, that number climbs even higher due to the relentless assault of saline humidity and brackish coastal air on sensitive electronic components. This is not a statistic that should alarm you—it is a realistic baseline for understanding why professional diagnosis matters.
This guide walks you through the exact diagnostic procedures used by factory-certified professionals, explains the tools and reasoning behind each step, and highlights why local conditions like our heavy hard water mineral scaling and salt-air exposure demand a specialized approach. Whether you are dealing with a flickering oven display or a dryer that trips the GFCI outlet, the process remains the same: isolate, verify, and confirm before replacing any part.
Step One: Safety Verification and Preliminary Isolation
Before any voltage is measured, the technician performs a visual inspection of the appliance, the power cord, and the wall receptacle. In League City homes, where older construction may still have two-prong outlets or ungrounded circuits, this step is critical. The technician checks for obvious signs of thermal degradation—melted plastic near terminal blocks, scorch marks on the control board, or discolored wire insulation—that can indicate chronic overcurrent conditions. They also verify that the outlet provides proper line voltage (typically 120V or 240V depending on the appliance) and that the ground path is intact.
This initial isolation phase often reveals the problem outright. A loose neutral wire inside the plug, for example, can cause intermittent power loss that mimics a failing control board. In a recent League City service call, a homeowner had replaced their refrigerator main board twice, only for the technician to find a corroded terminal on the compressor relay. The issue was not the board—it was a poor electrical connection caused by years of humid salt-air exposure breaking down the crimp. This is why we publish League City Appliance Trends What’s Breaking Most to help residents understand these common failure patterns.
Step Two: Multimeter Testing and Continuity Verification
The multimeter is the foundation of every electrical diagnostic. Technicians use it to perform three fundamental tests: voltage measurement, resistance measurement, and continuity verification. For a typical refrigeration circuit, the technician first measures voltage at the compressor terminals while the unit calls for cooling. If voltage is present but the compressor does not start, the issue is either the start relay, the overload protector, or the compressor windings themselves.
Continuity verification is used on switches, thermal fuses, and solenoid coils. A technician places the probes across the component terminals; if the meter beeps (or shows near-zero resistance), the path is complete and the component is electrically functional. If no continuity is present, the component has failed open. This is common with dryer thermal fuses, which blow when the vent is restricted—a frequent issue in League City homes where lint and humidity combine to clog dryer vents faster than expected. Our guide on 7 Common Dryer Problems And Quick Fixes explains how to check these safety devices without causing damage.
Using a Clamp-on Ammeter Under Load
While the DMM excels at static measurements, a clamp-on ammeter (or current clamp) measures the actual current draw while the appliance is running. This is invaluable for diagnosing motors and heating elements. A washing machine motor that draws 15 amps instead of its rated 8 amps indicates worn bearings or a partial winding short. A dryer heating element that draws no current despite having line voltage means the element is burned open. In coastal environments, ammeter readings may also reveal nuisance ground faults caused by salt-bridge corrosion across terminal blocks, a condition that mimics a genuine component failure.
Diagnosing Electronic Control Boards
Modern appliances rely on electronic control boards (ECBs) that manage everything from temperature regulation to cycle timing. When a board fails, the symptoms can be misleading: the display may go blank, buttons may not respond, or the appliance may run a cycle but never complete it. Technicians do not automatically replace the board—they first verify that all input signals (voltage, sensor resistance, switch closures) are reaching the board correctly.
If the board does need replacement, the technician uses a factory-authorized OEM part, not a generic aftermarket board. Aftermarket boards may lack the specific firmware calibration needed for the appliance’s sealed system or motor drive profile. This is especially critical for inverter-driven compressors and variable-speed motors, where a mismatched board can cause the compressor to run outside its operating envelope, leading to premature failure and voiding the manufacturer warranty.
Data Comparison: Component-Level Repair vs. Sub-Assembly Replacement
One of the most significant decisions in an electrical diagnosis is whether to repair the failed component at the circuit level or replace the entire sub-assembly (such as the whole control board or motor). The table below outlines the key differences based on NASTeC core service reference standards.
| Feature/Metric | Professional Component-Level Repair | Complete Sub-Assembly Replacement |
|---|---|---|
| Diagnostic Time Required | 30–60 minutes on the bench | 10–15 minutes in the appliance |
| Part Longevity After Repair | Often matches original life if OEM components are used | Will match manufacturer-rated lifespan |
| Structural Cost | Lower upfront (maybe $50–$100 for a relay or capacitor) | Higher upfront (often $150–$400 for a full board) |
| Risk of Future Failure in Same Circuit | Slightly higher if surrounding components are also degraded | Lower, because the new assembly includes updated components |
| Skill Required | High—requires schematic reading and soldering | Moderate—requires unplugging and reconnecting harnesses |
Advanced Diagnostic Insights from the Field
Experienced technicians develop a mental library of failure patterns that textbook training cannot replicate. Here are three advanced tips that separate professional diagnostics from guesswork.
1. Test Voltage Drop at the Terminal Block Under Load
A common mistake is measuring voltage at the wall outlet and assuming the appliance receives the same voltage. In reality, a corroded or loose connection at the terminal block can create resistance that drops voltage significantly when the appliance pulls current. Technicians measure voltage directly at the terminal block while the appliance is operating (if safe) to identify these hidden losses. In League City, galvanic corrosion from saline humidity often attacks the brass-to-copper connections at the terminal block, causing voltage drops that make motors run hot and shorten their life.
2. Check Capacitors with an ESR Meter, Not Just a Multimeter
A standard DMM can measure capacitance, but a failed capacitor may show correct capacitance while having high Equivalent Series Resistance (ESR). High ESR causes ripple current that damages the capacitor over time and can cause a motor to hum without starting. A dedicated ESR meter or an in-circuit capacitor tester reveals this condition. In our local coastal environment, capacitor failures are accelerated because salt-laden air infiltrates the casing, gradually increasing internal resistance.
3. Evaluate Thermal Fuses by Testing Resistance and Not Just Continuity
Some thermal fuses degrade over time before they blow completely. A fuse that still shows continuity but has a slightly elevated resistance (above 0.5 ohms) is beginning to fail. This condition can cause intermittent operation that confuses homeowners and even less experienced technicians. Replacing such a fuse proactively prevents sudden outages during critical use, such as a Thanksgiving oven cook cycle.
Common Homeowner Mistakes and Real Consequences
- Overloading the laundry drum: This stresses the drum spider arm and bearings, but it also forces the motor to draw higher current, which can overheat the motor thermal overload or vaporize the start capacitor oil. The result is a locked rotor condition that may require a full motor replacement.
- Using chemical drain cleaners in dishwashers: The strong alkaline chemicals attack rubber door gaskets and sump seals, causing leaks that drip directly onto the main control board located beneath the tub. We have seen entire motherboard replacements caused by a single treatment of a caustic “plumbing” cleaner.
Understanding the Cost of Electrical Diagnoses and Repairs
- Standard diagnostic trip fee: Typically $75 to $150 in the League City area, depending on the appliance type and distance. This covers the initial safety check, multimeter testing, and identification of the failed component.
- Tiered repair rates based on complexity: Simple part replacements like a thermal fuse or start relay may cost $150–$250 (including the part and labor). Control board or motor replacements often range from $300 to $600 because they require firmware verification and potential programming.
- Flat-rate sealed system work: Replacing a compressor, condenser, or evaporator in a refrigerator or AC unit is usually quoted flat-rate at $800–$1,200 because it involves refrigerant recovery, evacuation, and precise charging. This work must be performed by an EPA Section 608 certified technician.
Several factors influence these figures. First, premium luxury brand OEM parts (Sub-Zero, Wolf, Miele) cost 40–60% more than standard brands and may require special ordering. Second, advanced electronic control modules may need to be “flashed” with specific software using manufacturer diagnostic tools, which adds a programming fee. Third, physical accessibility matters—built-in coastal kitchen layouts often require pulling the unit out, disconnecting gas lines, or removing countertop supports, all of which increase labor time. For more advice on managing repair budgets, see Saving Money On Appliance Repairs Pro Tips.
Safety Standards and Certifications That Matter
Electrical diagnostics carry inherent risks, and professional technicians adhere to rigorous protocols to protect both themselves and the homeowner. EPA Section 608 certification is required for anyone handling refrigerants, ensuring that sealed system repairs do not vent harmful gases into the atmosphere. NASTeC (National Appliance Service Technician Certification) validates that the technician can perform electrical measurements, interpret schematics, and work with computerized control systems safely.
Equally important is the use of factory-authorized OEM replacement parts. While aftermarket parts may be cheaper, they often lack the exact electrical specifications—such as capacitance tolerance, thermal fuse temperature rating, or motor winding resistance—required by the original design. Using an incorrect part can create a fire hazard, especially in high-current circuits like dryer heating elements or oven bake elements. In League City, where clogged dryer vents from lint and humidity are common, a mismatched thermal fuse might fail to blow at the correct temperature, allowing lint to ignite. Our post on Emergency Washer Repair What To Do First includes safety checks that every homeowner should know before attempting any repair.
Additionally, technicians follow OSHA standard for lockout/tagout when working on gas valves and high-voltage circuits. They always verify that the appliance is physically disconnected from power before making resistance measurements, and they wear insulated gloves when probing live terminals. These practices are not optional—they are the difference between a safe repair and a preventable accident.
Frequently Asked Questions About Electrical Appliance Diagnostics
How can I tell if my appliance has an electrical issue versus a mechanical one?
A mechanical failure usually presents with noise, vibration, or physical binding. An electrical issue often involves no power (dead display), intermittent operation (stops mid-cycle), or tripped breakers. If your appliance hums but won’t start, it is likely an electrical component—such as a start capacitor or relay—that has failed, even if the motor itself is mechanically sound. A technician can confirm this by measuring the voltage and current at the motor terminals with a multimeter and ammeter.
Why does my dishwasher keep tripping the GFCI outlet?
GFCI outlets trip when they detect a current imbalance between the hot and neutral wires, which indicates leakage to ground. This is often caused by a failing heating element that has developed a small crack in its insulation, allowing water to bridge the circuit to ground. In League City, hard water scale accumulation on the heating element can accelerate this failure because the minerals trap moisture against the metal sheath. A technician will measure the element’s resistance to ground using a megohmmeter to confirm the leakage path. For more on dishwasher issues, refer to our Ultimate Guide To Fixing Common Dishwasher Issues.
Is it safe to use a universal relay on my refrigerator compressor?
No. Universal relays are designed to replace a range of original part numbers, but they may not match the exact start winding current, voltage rating, or thermal profile of your specific compressor. Using an incorrect relay can cause the compressor to cycle rapidly (short cycling), which overheats the windings and can lead to a locked rotor or even a burn-out that contaminates the sealed system. Always insist on the factory-specified OEM relay from the manufacturer or a direct-replacement part certified by the compressor brand.
What does it mean when my oven display shows an error code but the oven still heats?
An error code that appears alongside functionality often indicates a sensor feedback issue rather than a total failure. The oven control board monitors the temperature via a thermistor or RTD sensor. If the sensor resistance drifts outside normal range due to age or thermal degradation, the board may display an error but still allow heating because it uses a backup algorithm. This condition can cause the oven to overshoot or undershoot the set temperature, leading to uneven cooking. A technician can measure the sensor resistance at room temperature and compare it to the manufacturer’s published chart to determine if it is out of specification. For step-by-step troubleshooting, see How To Troubleshoot A Broken Oven Step By Step.
Professional Appliance Care in League City
Understanding how appliance repair technicians diagnose electrical problems gives you the confidence to ask the right questions and recognize thorough work. The process is never a guessing game; it is a structured investigation that respects the laws of electricity and thermodynamics. In League City, where the Gulf Coast environment places unique stress on every terminal, switch, and control board, relying on a technician who understands local conditions is the smartest investment you can make for your home appliances.
When your appliance shows signs of electrical trouble—whether it is a refrigerator that won’t cool, a washer that stops mid-cycle, or a dryer that overheats—do not ignore the warning signals. Prompt, accurate diagnosis prevents small faults from cascading into expensive failures. Our team at Elite Appliance Repair League City is factory-certified, NASTeC qualified, and intimately familiar with the hard water, salt-air, and humidity patterns that define this region. We will arrive with the right tools, the right parts, and the right knowledge to get your appliance running safely and efficiently again.
Contact us today to schedule a diagnostic service or learn more about maintaining your appliances in our coastal climate. Your home’s systems deserve nothing less than expert care.